Typical Lawn Sprinkler Head Issues and Exactly How to Repair Them
A well-tuned irrigation system disappears into the background. Turf stays even, beds thrive, and the water bill does not sting. Most of the time, when a system slips out of tune, the trail leads to the smallest components in the yard: the sprinkler heads. I have replaced hundreds of them across heavy clay lots, sandy yards near the coast, and dense urban lawns carved up by tree roots and sidewalks. The patterns repeat. Heads sink or tilt. Nozzles clog with grit. Rotors stop turning. Pressure throws mist everywhere. Each problem wastes water or starves a patch of grass, and each has a straight path to a fix if you understand what you are looking at.
The advice below focuses on what you can diagnose and repair without re-plumbing your entire yard. I will point out where a head issue is really a system issue in disguise, and when it is worth calling for help. Whether you are handling routine sprinkler maintenance, a targeted sprinkler repair, or planning a small upgrade during a larger sprinkler installation, the same principles keep showing up.
Know the head you are dealing with
Different heads fail in different ways. When you know what you are staring at, the repair gets easier.
Spray heads are the short pop-ups with a fixed fan pattern. Common heights are 2, 4, and 6 inches. They water small areas, typically 3 to 15 feet, using interchangeable nozzles like quarter, half, full, and variable arc bodies. They like around 30 psi at the head, and they are sensitive to debris because the nozzle orifice can be tiny.
Rotors are the taller bodies with a rotating stream, used for larger turf sections, often 20 to 40 feet between heads. Gear-driven rotors from brands like Hunter and Rain Bird want around 45 psi at the head. They have internal filters and drive mechanisms. When they fail, they either stop rotating or stall at a spot.
Rotary nozzles, sometimes called MP-style rotators, fit on spray bodies but act more like mini rotors. They throw multiple rotating streams and reach 13 to 30 feet, sipping water compared to traditional sprays. They run best around 40 to 45 psi, need clean water, and love even spacing.
Bubblers and drip conversions show up in beds. Bubblers on short risers can flood a small area for trees or shrubs. Drip conversion kits replace a spray head with a filter, pressure regulator, and a drip line takeoff, which is a smart retrofit when overspray is a chronic issue.
Each style uses a body, a pop-up stem, a spring, and a nozzle. Most also include an internal filter basket. A cracked body or failed seal leaks at the base. A clogged filter or nozzle starves the pattern. Misaligned stems waste water on sidewalks. Those are the common patterns to watch for.
Quick triage before you dig
A few checks during a run cycle save time and keep you from chasing the wrong problem.
- Watch a full cycle. Note which heads are weak, overspraying, or not popping up, and whether the problem follows one zone or is scattered.
- Check pressure symptoms. Fine mist that drifts away means pressure is too high. Short, sputtering throws suggest low pressure or a clog.
- Inspect around each head. Look for pooling near the base, sunken collars, or tilted caps that spray into the soil.
- Pull a stem up by hand. If it sticks or feels gritty, the seal and sleeve likely need cleaning or replacement.
- Compare head spacing to throw distance. If the water does not reach the next head, expect dry donuts no matter how you tweak the arc.
If everything on a single zone is weak, think upstream: a partially closed valve, a clogged master filter, a break in the lateral line, a kinked swing joint, or a pressure regulator set too low. If one head misbehaves and its neighbors look fine, the fix is usually at that head.
Clogged nozzles and filters
Dirt, PVC shavings, and sand find their way into nozzles and the small filter baskets under them. I see this most after repairs, when a line was opened and not flushed well, or after a strong storm that stirred up the main.
For spray heads, unscrew the nozzle by hand while the zone is off. Pinch and pull the small filter beneath the nozzle. Rinse both in a bucket, not on the lawn where you will lose them. If the filter looks worn or tears easily, replace it. While the nozzle is off, bump the zone on for a few seconds to flush the riser. Expect a messy geyser. Shut it down, reinstall the filter and nozzle, then run the zone again to check the pattern.
Rotors have a larger internal filter at the base of the stem. With the zone off, pull the stem up using a rotor key or needle-nose pliers with a gentle touch. Lock it up, then unscrew the nozzle screw a few turns so the nozzle can slide out. Remove the nozzle, catch the tiny set screw so it does not vanish in the grass, and pull the filter for cleaning. Flush the body briefly before reinstalling. If the rotor still does not rotate after cleaning, the drive mechanism may be worn or jammed beyond a simple service. At that point, I replace the whole head. The cost difference between a gear kit and a new mid-grade rotor often does not justify the time.
Rotary nozzles clog easily if the system is unfiltered. Most include a fine mesh basket. Use the small screen-cleaning cup that ships with many nozzles or rinse in water. If debris keeps returning, consider adding a zone filter or a pressure-regulated, filtered body during your next sprinkler installation or upgrade.
Misalignment, arc errors, and overspray
A large share of complaints turn out to be a head pointed the wrong way. Lawns change over time. Mowers bump heads, soil settles, kids play with sprinklers. A quarter pattern head that drifts to a 110 degree arc will water your driveway and leave a hungry corner.
On spray heads, the body should be level and vertical. The arc is set by the nozzle. Variable arc nozzles are tempting, but they drift more than fixed arcs. I use fixed nozzles unless a curve truly demands custom shaping. To orient a spray head, grip the body and twist the whole can so the pattern fans where it belongs. If the soil is compacted, you may have to dig around the head, loosen the swing joint, adjust, and backfill. If the head is tilted, correct the base, not the cap.
Rotors adjust differently by brand. Many set the right stop as a fixed point, then you adjust the left stop with a key in the arc slot. Others let you move both. Run the head and watch a full arc. Reset the right stop where you want it, then add or remove arc in small clicks until the sweep covers what it should. Resist the instinct to crank arc wide to hit a dry patch. If the head spacing is off, you will create puddles near the head and still miss the far edge. The better fix is spacing or a nozzle change.
Overspray into streets or fences is not just wasteful, it invites fines in some municipalities. When wind is common, swap high-precipitation fans for rotary nozzles that throw heavier streams. If misting hangs in the air, that is a pressure problem, not an alignment problem.
Misting and pressure problems
Water that leaves a head as fog does not make it to the turf. You can literally watch your money drift away. Sprays want about 30 psi at the nozzle. Rotors want about 45. Rotary nozzles are happiest between 40 and 45. Above those ranges, the water atomizes, especially on warm, dry afternoons.
Simple fixes help. If your spray heads do not have pressure-regulated bodies, swap them during your next round of sprinkler maintenance. PRS models hold output near 30 psi. Some nozzles also come pressure regulated. On zones with a single valve feeding both rotors and sprays, split the zone or pick a middle ground, but expect compromises. Zone-level pressure regulators or master regulators at the backflow are options when the whole system runs hot.
Low pressure shows up as short throws, heads that do not pop up, and rotors that stall. Before you assume a supply issue, walk the zone. Look for a stuck-open head bleeding water near grade. Check for a muddy patch that hints at a lateral break. Confirm the isolation valve by the backflow is fully open. If a single head is weak while neighbors blast, its filter or nozzle is the first suspect.
One last note on pressure: every 2 to 3 wraps of thread seal tape on the male threads is enough for sprinkler heads. More can crack a female fitting or migrate into the line where it clogs filters.
Sunken, tilted, or scalped heads
Lawns are living surfaces. Topdressing adds a half inch here. Soil settles a half inch there. Over five years, a head that was trim with grade can end up 2 inches low or leaning. Mowers then scalp the cap, chew the rubber seal, and suck grit inside. The spray pattern catches the lip of the turf and throws a weird crescent that leaves a dry halo.
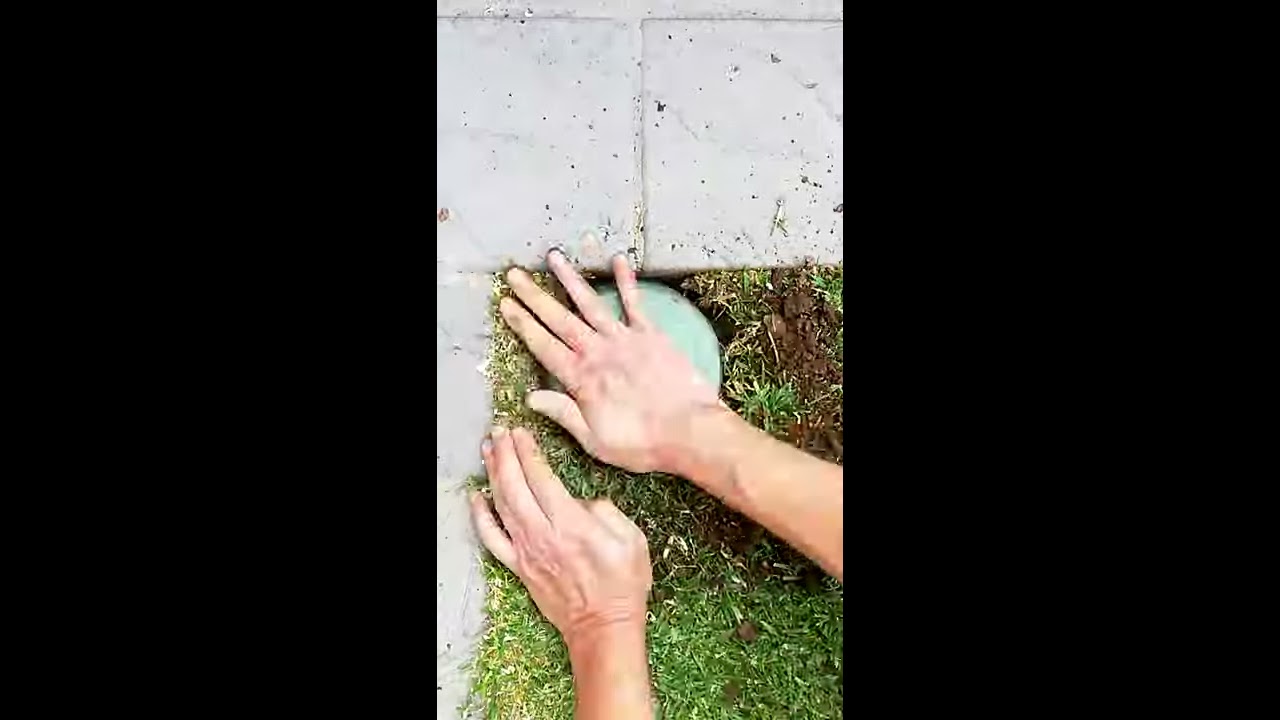
The fix is to raise and re-level the head. Dig a neat circle around the body with a hand trowel. Clear soil to the bottom of the head so you see the swing joint or the funny pipe. If the joint has give, lift the head to grade and add or remove soil beneath the base to lock it level. If the swing joint is tight or the head is connected to rigid PVC, cut in a new swing joint. A simple three-ell swing using flexible funny pipe and barbed fittings protects the head from mower hits and gives you room to adjust.
If a head sits next to a curb or hard edge, tilt it slightly away from the pavement. That counters the splash back and helps keep the pattern on the turf. Not more than a few degrees, or you will create a low spot at the base that pools water.
A concise field method to raise a sunken spray head
- Mark the turf edge with a flat spade and cut a 10 to 12 inch circle around the head so you can fold back a sod cap in one piece.
- Excavate to expose the swing joint. Clean soil off fittings so you can see cracks or kinks, and bail out any water.
- Lift and level the head to proper height. Add a compacted soil base under the body so it stays put when you backfill.
- Turn on the zone briefly to confirm height and pattern. Make final alignment adjustments, then backfill around the body and press the sod back.
- Water the area by hand to settle the soil and prevent an air pocket under the sod, then mow carefully the next cycle.
If the stem seal is chewed up, or the cap shows mower scars, replace the head instead of raising it. A fresh body with a pressure-regulated stem will save water and survive the next few years better than a battered one.
Leaking around the stem or at the base
A steady ooze at the top of a spray head when the zone is running points to a worn seal. Dirt rides the stem up and down, and over time the rubber loses its grip. Replace the head. You can try a cap and seal kit, but by the time the seal fails, the spring is usually tired too.
A leak at the base while the zone runs points to a cracked body or a loose connection. If the body threads into a swing joint, remove and inspect. Replace cracked bodies rather than trusting sealants. If the leak shows when the zone is off, and water slowly pools around a head, you may be looking at low head drainage.
Low head drainage vs. Stuck valve
When a zone shuts off and water continues to seep from the lowest head, that is often gravity doing what it does. The lateral pipes drain through the lowest point until they are empty. It may run for a minute or two, enough to form a puddle or erode mulch. The fix is a check valve at that head, or better, use check valve bodies throughout the zone. Most major brands offer check valve versions. They hold water in the lateral until the next cycle.
If water flows indefinitely, or the zone never fully shuts off, the valve likely has debris in the diaphragm or a failed solenoid. That is not a head issue, although you will see it at a head. Find the valve box for that zone, clean or replace as needed.
Heads that will not pop up or will not retract
Grit, thatch, and weak springs keep pop-ups from moving. If a head struggles to rise, run the zone and step on the turf around the body to compress thatch. Sometimes a mower pushed turf over the cap, and clearing the edges with a hand trimmer fixes it. If the stem rises slowly or wobbles, the seal is likely fouled. Cleaning can buy time, but replacement is the real fix.
If pop-ups do not retract after the cycle, shut the water and press the stems down by hand. If they feel sticky, clean or replace. If they feel fine but creep back up on their own, the zone may be holding pressure because of a backflow or valve issue. Bleed the line at a drain or open a head temporarily to let trapped pressure escape and re-evaluate.
Rotors that stop rotating or chatter
When a rotor stops turning, people often assume it died. Sometimes it just needs a thorough flush. Remove the nozzle, clean the filter, and run the body open for ten to twenty seconds to purge grit. Reinstall, then test again. If it chatters or advances in short jerks, either pressure is low, the nozzle is mismatched to the arc and spacing, or the drive is worn. Low pressure can be temporary if another zone is leaking. A worn drive, especially on heads older than eight to ten years, is not worth renovating. Replace the head, match the nozzle to the others on the zone, and re-set the arc.
A frequent rotor mistake is mismatched nozzles. If one head carries a large nozzle and its neighbor a small one, the pattern will look strange and the zone will not balance. During sprinkler maintenance, read the nozzle number stamped on each rotor and standardize. Manufacturers publish precipitation charts. Use them. Aim for matched precipitation within a zone.
Pattern gaps, dry donuts, and the myth of cranking up run time
Dry rings around heads, often called donuts, tell you a lot. With sprays, the heaviest water lands right at the head and at the far edge, with a lighter band mid-throw. With rotors and rotary nozzles, the stream spends more time near the head and near the far arc edges. That is why head-to-head coverage matters. The water from one head should reach the base of the next. If your installation missed that mark, increasing run time makes the wet areas wetter and the dry spots still dry.
You can mitigate with nozzle swaps. Smaller radius nozzles on the perimeter, larger in the interior, can tighten spacing errors. Changing a 15 foot spray to a 12 on a narrow edge reduces overspray and improves overlap. On rotors, drop from a 3.0 gpm nozzle to a 2.0 or 2.5 where pressure sags. That evens things out without touching the pipe.
When spacing is wildly off, nothing but physical changes will fix it. I have replaced two badly placed perimeter rotors with three rotary nozzles on spray bodies and solved a chronic corner problem in a single morning. It looked odd mixing styles in one zone, but the coverage and water use improved immediately. That is a reminder that sprinkler repair can be opportunistic, not just reactive.
When the head is broken clean off
A head run over by a car or snapped by a mower usually breaks at the riser. You will see a stub of PVC or funny pipe with jagged threads or a broken ell. First, shut down the water. Dig a generous hole to give yourself room. If the break is at a threaded ell, back it out and inspect the female threads on the swing joint. Replace any cracked fittings. If the riser broke flush and left thread shards in the fitting, use an internal extractor to remove them without destroying the socket.
Avoid stacking thread adapters to create height. I have seen four risers stacked like a precarious totem. Use a proper swing joint or a single cut of funny pipe so the head has room to flex. Bury rigid PVC deep enough to avoid mower blades, ideally 8 to 12 inches depending on frost depth and local code.
When you reassemble, keep the top of the cap at or just above finished grade. If you install low, scalping returns. If you install high, mowers will catch it again.
Controller settings that look like head problems
I have answered calls where “half the heads do not run,” and it turns out the controller was set to an odd program. Make sure you are on the right program letter and start time. A zone with a rotor head mix and a spray head mix should not share the same run time. Sprays might need 8 to 12 minutes per cycle. Rotors need longer, often 20 to 40 minutes to deliver the same depth. Rotary nozzles live between those numbers. If a mixed zone is unavoidable, use cycle-and-soak to help infiltration on slopes, and accept that you are compromising.
Seasonal adjustments matter. During spring green-up, systems often run longer than necessary. By midsummer, winds rise and humidity falls, and the same runtime under-waters the edges. Use your turf as the sensor. Gray-green color and footprints that linger signal stress. Before you add time, confirm coverage so you do not mask a clogged or misaligned head with longer runtimes.
Spring start-up and fall shutdown habits that prevent head failures
Most clogs I encounter in May trace back to hurried spring start-ups. Open the main valve slowly. Let the backflow pressurize without slamming water through dry lines. Run each zone while standing near the valve box and listen. A sudden hiss that does not settle can indicate a small lateral break that will not flood the yard for weeks, but quietly robs pressure.
In the fall, blow-out is critical in freezing climates. Heads and swing joints hold water in odd places. Compressed air at a modest pressure, typically 50 to 60 psi at the manifold, will clear most residential systems. Higher can damage components, especially drip regulators. Cycle zones, and stop blowing when mist turns to dry air. Leaving a fine film of water is normal, but trapped pockets inside a rotor can split the case in a hard freeze. If that happens, you usually do not see the break until spring when the rotor leaks at the base. Replacing the head is the fix, and adding a drain or adjusting the blow-out procedure watering system installation resource is the prevention.
Tools and small parts that make head work faster
A few inexpensive tools pay for themselves quickly. A flat spade with a sharp edge cuts clean sod circles that re-knit. A rotor adjustment key for your brand saves endless frustration. An internal pipe extractor removes broken risers cleanly. Keep a handful of swing joint parts, funny pipe, clamps, and common nozzles on hand. A pressure gauge with a hose bib adapter or a pitot tube lets you measure at the head and take guesswork out of pressure questions.
When you reinstall, two to three wraps of tape on male threads is enough. Hand tight plus a quarter turn with pliers seats most heads. Over-tightening cracks female fittings, which do not always show until you backfill and run the zone.
When to repair, when to replace, and when to re-think
A head older than eight to ten years that has seen gritty water is a candidate for replacement rather than repair. Newer heads have better seals, check valves, and pressure regulation. If you are touching more than a third of the heads on a zone, plan a mini-renovation: convert to pressure-regulated bodies, standardize nozzles, verify spacing, and swap any damaged swing joints. The water savings often offset the parts in a single season in high-rate areas.
Some problems look like head issues but trace to installation choices. If a rotor zone was built with 1 inch pipe and then extended three times with 0.75 inch pipe and undersized nozzles, you will chase weak throws until you fix the bottlenecks. If your spray zone waters a narrow strip against a fence and constantly oversprays, stop fighting physics and retrofit that strip to drip. Many manufacturers sell conversion kits that thread right onto the existing spray body, add filtration and regulation, and let you run 0.6 gph emitters exactly where the plants are. That is sprinkler repair, sprinkler maintenance, and smart sprinkler installation strategy rolled into one.
A short case from the field
A client with a corner lot complained of brown crescents along the sidewalk. The system had fifteen-year-old sprays with variable arc nozzles. Heads were 2 inches tall, set 1 inch below grade in a thick fescue lawn. Water pressure at the backflow read 75 psi. During the run, mist drifted into the street. At the corners, fans overshot, then wind pushed the water back, leaving the turf dry.
We replaced the corner heads with 4 inch pressure-regulated bodies, fixed-arc nozzles matched to the geometry, and raised each to sit flush. On the long side strip, we swapped the sprays to rotary nozzles to cope with the wind. We added check valves on the low heads near the storm drain. Runtime went down by about 20 percent. The brown crescents disappeared within three weeks, the sidewalk stayed dry, and the city’s water-use portal flagged a drop of about 2,000 gallons for the month compared to the prior year’s June. The only pipe we touched was the three swing joints that had been glued rigid in the original build.
Costs, time, and when to call a pro
A homeowner with basic tools can clean nozzles, replace spray heads, and realign rotors in an afternoon. Expect 10 to 20 minutes per head for cleaning and adjustment if access is clear, more if you are cutting sod and rebuilding swing joints. Parts range roughly from 3 to 12 dollars for spray heads, 10 to 30 for rotors, and a few dollars per nozzle. Pressure-regulated bodies cost a bit more, but if you see misting, they pay back quickly.
Call a professional when you suspect a buried lateral leak, the valve box is flooded, or multiple zones show pressure anomalies that do not trace to obvious clogs. If your controller programming baffles you or you want to re-zone mixed areas, a good tech will save you hours and avoid half-measures that cost you later. When you sell a home, a documented service showing recent sprinkler maintenance often helps reassure buyers that the landscape will not surprise them with a midsummer repair bill.
Parting advice from the trenches
A sprinkler system is a balance of hydraulics, mechanics, and the realities of a living landscape. Small habits make a big difference. Flush lines after every repair. Standardize nozzles within zones. Use swing joints generously. Keep heads at grade, level and vertical, except where a subtle tilt helps an edge. Match pressure to the head’s design, not the other way around. When a pattern looks wrong, stand in the spray and look from the head’s perspective. You will often see the obstruction, the tilt, or the arc drift that is invisible from the sidewalk.
Sprinkler repair is not glamorous, but it is satisfying work. The fixes are tactile and immediate. You clean a filter, raise a head, swap a nozzle, and the pattern sharpens like focusing a lens. Spread those wins across a yard and the whole system steps back into the background where it belongs.